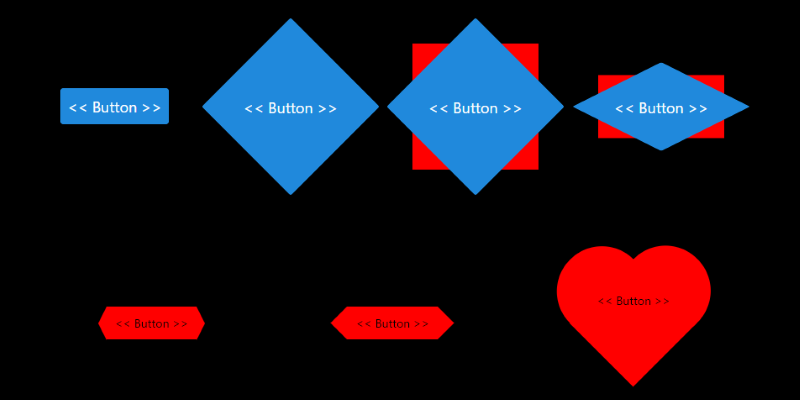
React Native でボタンなどのユーザインターフェースを作るときは正方形か角丸、
円形くらいだったのですが、スライダーのつまみにひし形を使った時にもっといろんな形を採用してもいいんじゃないかと思いました。
ちょっと好きな形を作る練習してみましょう。
ひし形
ひし形(あるいは四角形を45度回転させたもの)は簡単でUI的にも使いやすいです。
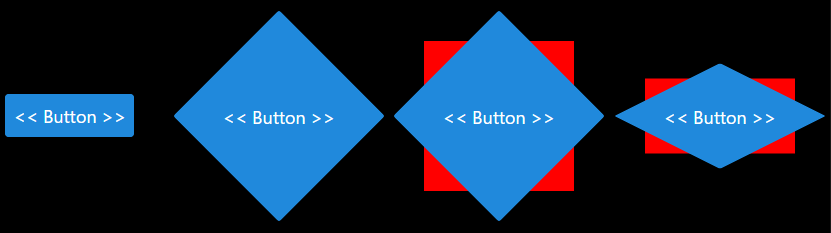
react native elements のようなライブラリを使っていてもコンテナ、ボタン、テキストの style 指定だけでできるため、問題なく使うことが出来ます。
コンテナを45度回転させ、テキストを戻す。
ひし形にしたければ潰した後にテキストを引き延ばすことで実装できます。
|
1 2 3 4 5 6 7 8 9 10 11 12 13 14 15 16 17 18 19 20 21 22 23 24 25 26 27 28 29 30 31 32 33 34 35 36 37 38 39 40 41 42 43 44 45 |
import React from "react"; import { View, StyleSheet } from "react-native"; import { Button } from "react-native-elements"; const RotButton = () => ( <Button title="<< Button >>" containerStyle={styles.btn1c} buttonStyle={styles.btn1b} titleStyle={styles.btn1t} /> ); export default () => { return ( <View style={styles.container}> <Button title="<< Button >>" /> <RotButton /> <View style={{ backgroundColor: "red" }}> <RotButton /> </View> <View style={{ backgroundColor: "red", transform: [{ scaleY: 0.5 }] }}> <Button title="<< Button >>" containerStyle={styles.btn1c} buttonStyle={styles.btn1b} titleStyle={styles.btn1t2} /> </View> </View> ); }; const styles = StyleSheet.create({ container: { flex: 1, flexDirection: "row", justifyContent: "space-around", alignItems: "center", }, btn1c: { transform: [{ rotate: "45deg" }] }, btn1b: { width: 150, height: 150 }, btn1t: { transform: [{ rotate: "-45deg" }] }, btn1t2: { transform: [{ rotate: "-45deg" }, { scaleY: 2 }] }, }); |
注意点としては赤色で表示した部分が View の大きさとなっていることです。
(この View で overflow: "hidden" すれば八角形にしたりもできる)
複数組み合わせる際には特にですが、場所や大きさの計算を間違えないように気を付ける必要があります。
6角形など
style 単体では書けないような形を考えます。
html / css の場合は ::before や ::after で実装するパターンです。
ライブラリでも書けなくないですが、素のReact Nativeコンポーネントを使った方が楽です。また<TouchableHighlight> は動作に癖があるので<TouchableOpacity> を使います。
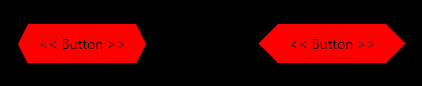
border を使う
border の LRTB の1方向を除いて透過することで三角形を作る方法です。
|
1 2 3 4 5 6 7 8 9 10 11 12 13 14 15 16 17 18 19 20 21 22 23 24 25 26 27 |
<TouchableOpacity activeOpacity={0.6} onPress={() => console.log("Pressed!")}> <View style={{ backgroundColor: "red", padding: 10 }}> <View style={{ position: "absolute", top: 0, left: "100%", borderColor: "transparent", borderLeftColor: "red", borderWidth: 20, borderLeftWidth: 10, }} /> <View style={{ position: "absolute", top: 0, right: "100%", borderColor: "transparent", borderRightColor: "red", borderWidth: 20, borderRightWidth: 10, }} /> <Text>{"<< Button >>"}</Text> </View> </TouchableOpacity> |
実装は容易ですが、問題点として border 全体が判定範囲に入るため意図しない押下が起きえます。
複数の View を組み合わせる
長方形のボタン本体の両端に正方形を回転させた View を追加します。
transform で正方形を両端から半分動かして、対角線が高さになるように 1/√2 倍して、45度回転させます。
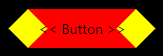
width に合わせた正方形なら paddingTop:"100%" だけでいいんですが、height に合わせるために onLayout イベントで高さを拾っています。
|
1 2 3 4 5 6 7 8 9 10 11 12 13 14 15 16 17 18 19 20 21 22 23 24 25 26 27 28 29 30 31 32 33 34 35 36 37 38 39 40 41 42 43 44 45 46 47 48 49 50 51 52 |
const HexButton2 = () => { const [w, setW] = React.useState(0); const onLayout = (e: any) => setW(e.nativeEvent.layout.height); return ( <TouchableOpacity activeOpacity={0.6} onPress={() => console.log("Pressed!")} onLayout={onLayout} > <View style={{ backgroundColor: "red", padding: 10, }} > <View style={{ backgroundColor: "red", zIndex: -1, width: w, height: "100%", position: "absolute", top: 0, left: "100%", transform: [ { translateX: -w / 2 }, { scale: 0.70710678118 }, { rotate: "-45deg" }, ], }} /> <View style={{ backgroundColor: "red", zIndex: -1, width: w, height: "100%", position: "absolute", top: 0, right: "100%", transform: [ { translateX: w / 2 }, { scale: 0.70710678118 }, { rotate: "-45deg" }, ], }} /> <Text>{"<< Button >>"}</Text> </View> </TouchableOpacity> ); }; |
多少複雑になりますが想定通りの判定範囲になっています。
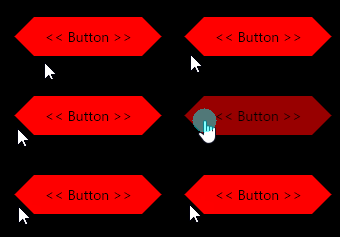
このままだと角度が45度で固定されるのと半透明ボタンが作れません。

これらを解決するには View でちゃんと三角形を作る必要があります。
ハート形のボタン♡
複数 View と transform に慣れてくると簡単な形なら自由に作れるようになる。
四角形を45度回転させた形◆と円2つ●を組み合わせてハート形を作ってみます。
|
1 2 3 4 5 6 7 8 9 10 11 12 13 14 15 16 17 18 19 20 21 22 23 24 25 26 27 28 29 30 31 32 33 34 35 36 37 38 39 40 41 42 43 44 45 46 47 48 49 50 51 |
<TouchableOpacity activeOpacity={0.6} onPress={() => console.log("Pressed!")} onLayout={onLayout} style={{ transform: [{ rotate: "-45deg" }], }} > <View style={{ backgroundColor: "red", padding: 10, height: w, justifyContent: "center", }} > <View style={{ backgroundColor: "red", zIndex: -1, width: w, height: "100%", position: "absolute", top: 0, left: "100%", borderRadius: 100, transform: [{ translateX: -w / 2 }], }} /> <View style={{ backgroundColor: "red", zIndex: -1, width: w, height: "100%", position: "absolute", top: "-50%", right: "50%", borderRadius: 100, transform: [{ translateX: w / 2 }], }} /> <Text style={{ transform: [{ rotate: "45deg" }, { translateY: -w / 4 }], }} > {"<< Button >>"} </Text> </View> </TouchableOpacity> |
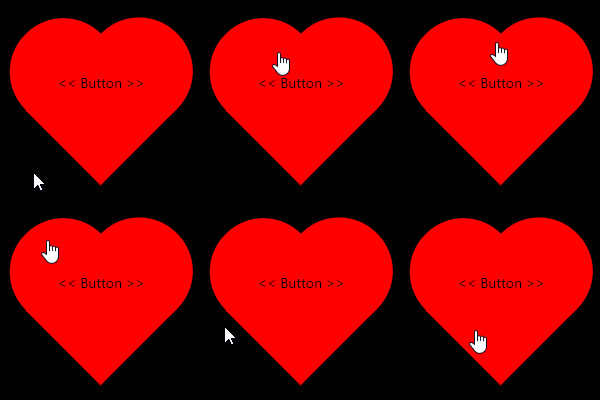
コンテナと四角と丸2つを組み合わせるのが正攻法っぽいですが、面倒だったのでコンテナごと回転させてテキストを逆回転させる方法にしました。
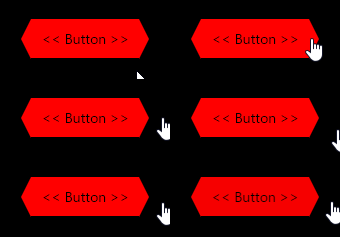
どう面倒かと言いうと TouchableOpacity 自体の判定は正方形で残るので、そのままだと以下のような当たり判定になってしまします。
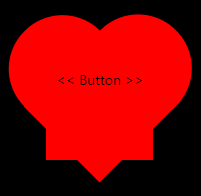
これを TouchableOpacity 自体を回転させることで回避するのが楽でした。