前回CycleGANとpix2pixを使ってみましたが、他の派生GANも試してみたい。
特に有名なStyleGANの改良版であるStyleGAN2を使ってみます。
今回はTensorFlowを使います。
2年前に「Windows10にTensorFlow-GPUをインストール」しましたが、とにかくバージョン依存が面倒だった記憶しかない。
インストールとテスト
NVIDIA の StyleGAN2 を使わせてもらいます。
https://github.com/NVlabs/stylegan2
とりあえずクローンしてテストプログラムを動かしてみましょう。
|
1 2 3 |
git clone https://github.com/NVlabs/stylegan2.git cd stylegan2 nvcc test_nvcc.cu -o test_nvcc -run |
まぁすんなりいくとも思えないので環境構築します。
環境構築
Python
64-bit Python 3.6
https://www.python.org/downloads/
前回アップデートしたばっかりだというのに3.6に戻します。
CUDA
CUDA 10.0 toolkit and cuDNN 7.5.
GPU計算のために CUDA Toolkit と CUDA Deep Neural Network library (cuDNN) をインストールします。1つ以上の高性能GPU(メモリ16G以上)とかありますが、とりあえず気にしない。
https://developer.nvidia.com/cuda-toolkit-archive
https://developer.nvidia.com/cuda-10.0-download-archive
https://developer.nvidia.com/cudnn
CUDAはインストーラを使うだけだけど、今回は例外発生とかでアプリケーションエラーになりました。
ウイルス対策ソフトを停止したり、カスタムインストールで「Visual Studio Integration」をなくしたりするとインストールできた。
cuDNNはCUDAのバージョンに合わせたものをダウンロード(会員登録必須)。
解凍してCUDAフォルダ(デフォルトだとC:\Program Files\NVIDIA GPU Computing Toolkit\CUDA\v10.0\bin)の対応するフォルダに入れる。
Tensorflow
TensorFlow 1.14 — TensorFlow 1.15 will not work.
|
1 |
pip install tensorflow-gpu==1.14.0 |
Pythonのバージョンと合っていれば問題ないはずです。
バージョンがあってなければ Could not find a version that satisfies the requirement など文句を言われます。
例えば今回のver 1.14がインストール可能なPythonバージョン一覧はこちらで確認できます。
すでにインストール済みで変な感じになるときは --upgrade や --ignore-installed を付けて置き換えましょう。
確認
|
1 2 3 4 5 6 7 8 9 |
> python -V Python 3.6.7 > nvcc -V release 10.0, V10.0.130 > pip list | grep tensorflow tensorflow-estimator 1.14.0 tensorflow-gpu 1.14.0 |
リポジトリに戻ってもう一度テスト。
|
1 2 |
> nvcc test_nvcc.cu -o test_nvcc -run nvcc fatal : Cannot find compiler 'cl.exe' in PATH |
Visual Studio を統合しなかったからかコンパイラが見つからない。
ディレクトリ検索すると「C:\Program Files (x86)\Microsoft Visual Studio\2017\BuildTools\VC\Tools\MSVC\14.16.27023\bin\Hostx64\x64」にあるらしい。
バージョンは新しい方がいいだろうとMicrosoftからインストーラを落として、2019本体とC++ツールをインストールしました。
するとこんなエラーに。
|
1 2 |
> nvcc test_nvcc.cu -o test_nvcc -run host_config.h(143): fatal error C1189: #error: -- unsupported Microsoft Visual Studio version! Only the versions between 2013 and 2017 (inclusive) are supported! |
大人しく2017の方のPathを通しました。
このとき大量の warning C4819 が出るので -Xcompiler "/wd 4819" オプションを付けると見やすくなります。
またPathを通す前に -ccbin オプションで指定できるので確認に使えます。
|
1 |
> nvcc -ccbin "C:\Program Files (x86)\Microsoft Visual Studio\2017\BuildTools\VC\Tools\MSVC\14.16.27023\bin\Hostx64\x64" test_nvcc.cu -o test_nvcc -run -Xcompiler "/wd 4819" |
ここまで来てようやく確認プログラムが動きます。
|
1 2 3 4 5 |
> nvcc test_nvcc.cu -o test_nvcc -run -Xcompiler "/wd 4819" test_nvcc.cu ライブラリ test_nvcc.lib とオブジェクト test_nvcc.exp を作成中 CPU says hello. GPU says hello. |
サンプル生成
サンプルプログラムを動かしてみます。
モジュール不足で怒られたので、必要に応じてインストールしましょう。
|
1 2 3 4 5 |
// ModuleNotFoundError: No module named 'PIL' > pip install pillow // ModuleNotFoundError: No module named 'requests' > pip install requests |
ここでちょっと特殊なエラーが出ました。
|
1 2 3 |
> python run_generator.py generate-images --network=gdrive:networks/stylegan2-ffhq-config-f.pkl --seeds=6600-6625 --truncation-psi=0.5 ... RuntimeError: Could not find MSVC/GCC/CLANG installation on this computer. Check compiler_bindir_search_path list in "\dnnlib\tflib\custom_ops.py". |
これはcompiler_bindir_search_pathのパスが実際と違うためです。
|
1 2 3 4 5 |
compiler_bindir_search_path = [ 'C:/Program Files (x86)/Microsoft Visual Studio/2017/Community/VC/Tools/MSVC/14.14.26428/bin/Hostx64/x64', 'C:/Program Files (x86)/Microsoft Visual Studio/2019/Community/VC/Tools/MSVC/14.23.28105/bin/Hostx64/x64', 'C:/Program Files (x86)/Microsoft Visual Studio 14.0/vc/bin', ] |
ここに実際のパスを追加しましょう。

修正してサンプルをいくつか動かすと result に画像が生成されました。
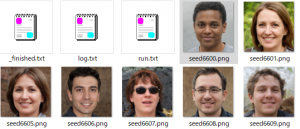
細かい動作はわからないけどとりあえず動いたので一安心。
準備で結構手間取ったので、データセットの準備から実践までは次回。