一月ほど前に失敗した「React Native (Expo)でカメラプレビューにエフェクト」のリベンジです。
React Native(Expo managed)の環境で、カメラのプレビュー画面を入力としてOpenGLで編集して表示する方法を見つけたので書いておきます。
問題のおさらい
前回の内容での問題はカメラプレビューをgl-reactの<Node/>にtexture2Dとして渡せないため、連続して画像保存して渡すことにしたが使い物にならないことでした。
今回は直接渡す方法が見つかったので、これを使って解決します。
救世主 webgltexture-loader
https://github.com/gre/webgltexture-loader
これはWebGLTextureのロードとキャッシュに関するライブラリです。
gl-reactのように環境ごとにパッケージがわかれているので、今回実際に使うのはwebgltexture-loader-expo-cameraです。
|
1 2 3 4 5 |
//install command $yarn add webgltexture-loader-expo-camera //js init import "webgltexture-loader-expo-camera"; |
importするだけでOKです。
ちなみにこれなしで<Node>にカメラを渡そうとすると次のエラーになります。
Node#1(ShaderName#2), uniform t: no loader found for value, Camera {...
簡単な使い方の説明
とりあえずCameraを使うための基本設定と<Surface>を定義しておきます。
|
1 2 3 4 5 6 7 8 9 10 11 12 13 14 15 16 17 18 19 20 21 22 23 24 |
export default () => { const [hasPermission, setHasPermission] = React.useState(null); React.useEffect(() => { (async () => { const { status } = await Camera.requestPermissionsAsync(); setHasPermission(status === "granted"); })(); }, []); if (!hasPermission) { return ( <View> <Text>No access to camera</Text> </View> ); } return ( <Surface style={{ width: "100%", height: "100%" }}> <CameraNode /> </Surface> ); }; |
続いて肝心のNodeの設定です。
|
1 2 3 4 5 6 7 8 9 10 11 12 13 14 15 16 17 18 19 20 21 22 23 24 25 26 27 28 |
export const CameraNode = () => { const [type, setType] = React.useState(Camera.Constants.Type.back); const [, forceUpdate] = React.useReducer(x => ++x, 0); const cameraRef = React.useRef<Camera>(); const loopRef = React.useRef(null); React.useEffect(() => { const loop = () => { loopRef.current = requestAnimationFrame(loop); forceUpdate(); }; loopRef.current = requestAnimationFrame(loop); return () => { cancelAnimationFrame(loopRef.current); }; }, []); return ( <Node shader={shaders.Test} uniforms={{ t: () => cameraRef.current }} > <Camera type={type} ref={cameraRef} /> </Node> ); }; |
まずwebgltexture-loaderのおかげでt: () => cameraRef.currentが可能に。
requestAnimationFrameとcancelAnimationFrameでアニメーション管理。
ただloopRefは再描画の対象にならないため前にやったforceUpdateを使っています。
これで処理可能なフレームごとに描画が行われることになります。
ついでに今回使ったシェーダーはこちら。
|
1 2 3 4 5 6 7 8 9 10 11 12 13 14 |
const shaders = Shaders.create({ Test: { frag: GLSL` precision highp float; varying vec2 uv; uniform sampler2D t; void main(){ gl_FragColor = uv.x<0.5 ? texture2D(t, vec2(1.0-uv.x, 1.0-uv.y)) : texture2D(t, vec2(uv.x, 1.0-uv.y)); } ` } }); |
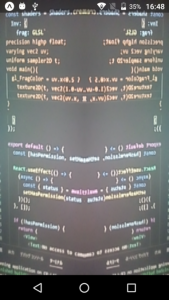
x=0.5で反転する鏡処理です(x, yの反転が煩雑なのは座標系の問題)。

これでリアルタイムOpenGL処理ができるようになりました。